您当前所在位置:首页 > 网络编程 > JavaScript
JavaScript
jquery插件实现扫雷游戏(3)
这篇文章主要介绍了jquery插件实现扫雷游戏的第三篇,文中示例代码介绍的非常详细,具有一定的参考价值,感兴趣的小伙伴们可以参考一下
本文实例为大家分享了jquery插件实现扫雷游戏的第3篇,供大家参考,具体内容如下
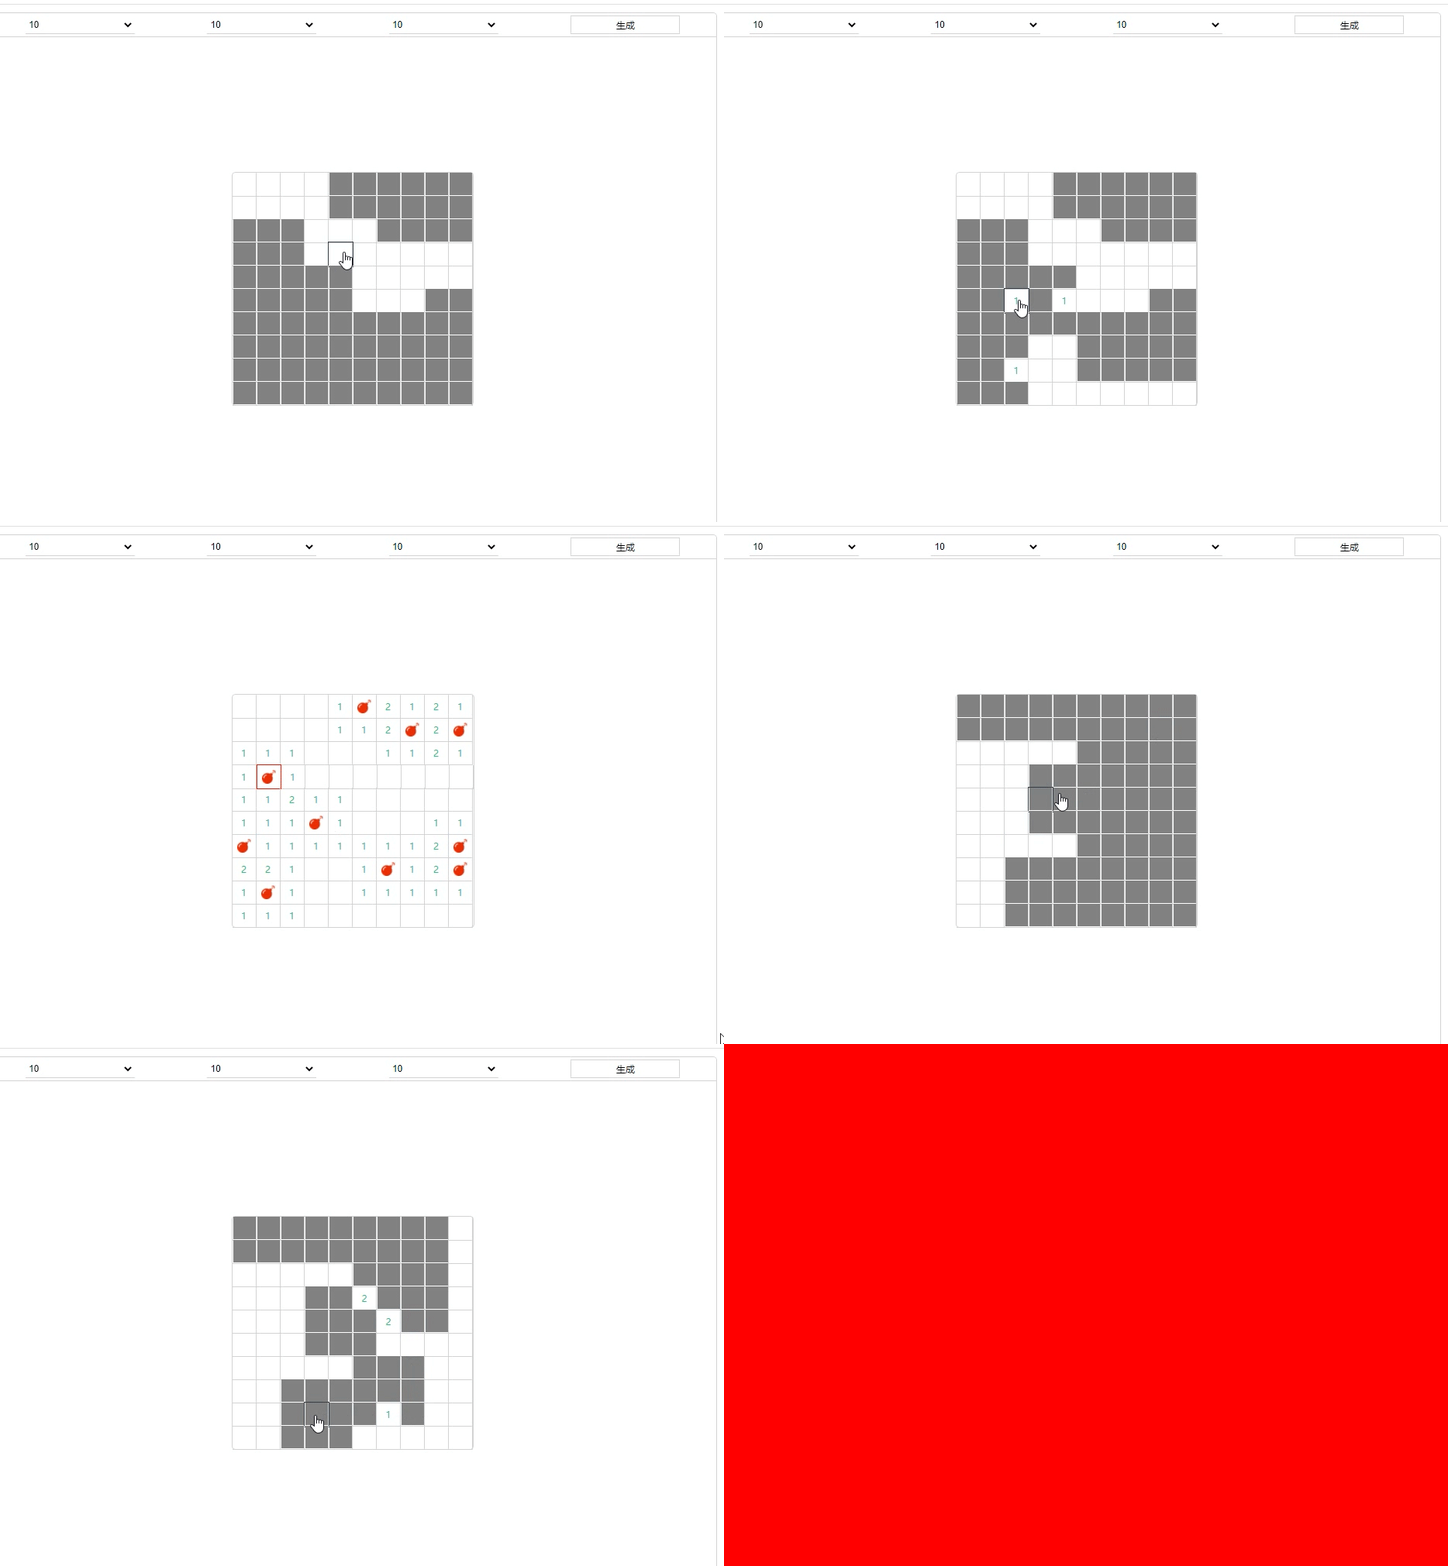
完成,效果感觉还不错,就是脸黑第一下容易挂
效果如下

代码部分
* {
 margin: 0px;
 padding: 0px;
 font-size: 12px;
}

#div {
 position: fixed;
 top: 10px;
 bottom: 10px;
 left: 10px;
 right: 10px;
 border: 1px solid lightgray;
 border-radius: 5px;
 display: flex;
 justify-content: center;
 align-items: center;
 overflow: hidden;
}

#box {
 border: 1px solid lightgray;
 border-radius: 5px;
}

.row {
 white-space: nowrap;
 height: 30px;
}

.item {
 display: inline-flex;
 justify-content: center;
 align-items: center;
 height: 30px;
 width: 30px;
 border-right: 1px solid lightgray;
 border-bottom: 1px solid lightgray;
 cursor: pointer;
 position: relative;
}
.item.num1::after{
 content: '1';
 color: #1abc9c;
 position: absolute;
 top: 0;
 bottom: 0;
 left: 0;
 right:0;
 display: flex;
 justify-content: center;
 align-items: center;
 z-index: 2;
}
.item.num2::after{
 content: '2';
 color: #2ecc71;
 position: absolute;
 top: 0;
 bottom: 0;
 left: 0;
 right:0;
 display: flex;
 justify-content: center;
 align-items: center;
 z-index: 2;
}
.item.num3::after{
 content: '3';
 color: #3498db;
 position: absolute;
 top: 0;
 bottom: 0;
 left: 0;
 right:0;
 display: flex;
 justify-content: center;
 align-items: center;
 z-index: 2;
}
.item.num4::after{
 content: '4';
 color: #9b59b6;
 position: absolute;
 top: 0;
 bottom: 0;
 left: 0;
 right:0;
 display: flex;
 justify-content: center;
 align-items: center;
 z-index: 2;
}
.item.num5::after{
 content: '5';
 color: #f1c40f;
 position: absolute;
 top: 0;
 bottom: 0;
 left: 0;
 right:0;
 display: flex;
 justify-content: center;
 align-items: center;
 z-index: 2;
}
.item.num6::after{
 content: '6';
 color: #e67e22;
 position: absolute;
 top: 0;
 bottom: 0;
 left: 0;
 right:0;
 display: flex;
 justify-content: center;
 align-items: center;
 z-index: 2;
}
.item.num7::after{
 content: '7';
 color: #e74c3c;
 position: absolute;
 top: 0;
 bottom: 0;
 left: 0;
 right:0;
 display: flex;
 justify-content: center;
 align-items: center;
 z-index: 2;
}
.item.num8::after{
 content: '8';
 color: #34495e;
 position: absolute;
 top: 0;
 bottom: 0;
 left: 0;
 right:0;
 display: flex;
 justify-content: center;
 align-items: center;
 z-index: 2;
}
.item.boom{
 background-image: url(../img/boom.png);
 background-size: 60% 60%;
 background-repeat: no-repeat;
 background-position: center center;
}
.item::before{
 position: absolute;
 content: '';
 top: 0.5px;
 left:0.5px;
 bottom: 0.5px;
 right: 0.5px;
 background-color: gray;
 z-index: 3;
}
.item.click::before{
 content: none;
}
.item:hover{
 outline: 1px solid #2c3e50;
}

#menu {
 border-bottom: 1px solid lightgray;
 position: absolute;
 top: 0;
 left: 0;
 right: 0;
 height: 30px;
 display: flex;
 background-color: white;
 z-index: 10;
}
.mitem{
 flex: 1;
 display: flex;
 justify-content: center;
 align-items: center;
}
.sl{
 border: none;
 border-bottom: 1px solid lightgray;
 outline: none;
 width: 60%;
 height: 80%;
}
.item.warn{
 border: 1px solid red;
}
.btn{
 border: none;
 border: 1px solid lightgray;
 outline: none;
 width: 60%;
 height: 80%;
 background-color: transparent;
 cursor: pointer;
}
.mitem *:hover{
 background-color: lightgray;
}
html:
<!DOCTYPE html>
<html>
 <head>
  <meta charset="utf-8">
  <title>做一个扫雷</title>
  <script src="js/jquery-3.4.1.min.js"></script>
  <script src="js/yqlsl.js"></script>
  <link href="css/yqlsl.css" rel="stylesheet" type="text/css" />
 </head>
 <body>
  <div id="div">
   <div id="box">

   </div>
   <div id="menu">
    <div class="mitem">
     <select class="sl" id="x">
      <option value="10">10</option>
      <option value="11">11</option>
      <option value="12">12</option>
      <option value="13">13</option>
      <option value="14">14</option>
      <option value="15">15</option>
      <option value="16">16</option>
      <option value="17">17</option>
      <option value="18">18</option>
      <option value="19">19</option>
      <option value="20">20</option>
     </select>
    </div>
    <div class="mitem">
     <select class="sl" id="y">
      <option value="10">10</option>
      <option value="11">11</option>
      <option value="12">12</option>
      <option value="13">13</option>
      <option value="14">14</option>
      <option value="15">15</option>
      <option value="16">16</option>
      <option value="17">17</option>
      <option value="18">18</option>
      <option value="19">19</option>
      <option value="20">20</option>
     </select>
    </div>
    <div class="mitem">
     <select class="sl" id="c">
      <option value="10">10</option>
      <option value="20">20</option>
      <option value="30">30</option>
      <option value="40">40</option>
      <option value="50">50</option>
      <option value="60">60</option>
      <option value="70">70</option>
      <option value="80">80</option>
      <option value="90">90</option>
      <option value="99">99</option>
     </select>
    </div>
    <div class="mitem">
     <button type="button" class="btn" id="pro">生成</button>
    </div>
   </div>
  </div>
 </body>
</html>
js:
$(document).ready(function() {
 var x = 10; //x轴
 var y = 10; //y轴
 var c = 10; //雷数
 var boom = []; //产生炸弹的坐标
 var $menu = $("#menu");
 var $box = $("#box");


 //同步参数
 $("#x").change(function() {
  x = parseInt($(this).val());
  console.log(x);
 })
 $("#y").change(function() {
  y = parseInt($(this).val());
 })
 $("#c").change(function() {
  c = parseInt($(this).val());
 })
 $(document).on('click', '#box .item', function() {
  $(this).addClass("click");
  var pos = {
   x:parseInt($(this).attr("data-x")),
   y:parseInt($(this).attr("data-y"))
  }
  if($(this).hasClass('boom')){
   $(".item").addClass('click')
   $(this).addClass('warn');
  }
  afterclick(pos);
 })
 $("#pro").click(function() {
  draw();
  draw();//绘制
  booms();//产生炸弹参数
  drawbooms();//绘制炸弹
  drawnum();//遍历所有块,生成提示
 })
 draw();//绘制
 booms();//产生炸弹参数
 drawbooms();//绘制炸弹
 drawnum();//遍历所有块,生成提示
 function draw() { //绘制图片
  $box.html('');
  for (var a = 0; a < x; a++) {
   var $row = $("<div class='row'></div>");
   for (var b = 0; b < y; b++) {
    var $item = $("<div class='item' data-x='"+a+"' data-y='"+b+"'></div>");
    $item.appendTo($row);
   }
   $row.appendTo($box);
  }
 }
 function afterclick(p){//解放所有空白块,并且把所有空白快挨着的提示展示出第第一层
  var arr = [
   {x:(p.x-1),y:(p.y-1)},
   {x:(p.x-1),y:(p.y)}  ,
   {x:(p.x-1),y:(p.y+1)},
   {x:(p.x+1),y:(p.y-1)},
   {x:(p.x+1),y:(p.y)}  ,
   {x:(p.x+1),y:(p.y+1)},
   {x:(p.x),y:(p.y+1)}  ,
   {x:(p.x),y:(p.y-1)}
  ]
  arr.forEach(item=>{
   if($dom(item).hasClass('nonum')&&!$dom(item).hasClass('click')&&!$dom(item).hasClass('boom')){
    $dom(item).click();
   }
  })
 }
 function drawnum(){
  for(var a = 0;a<x;a++){
   for(var b = 0;b<y;b++){
    var pos = {x:a,y:b};
    //遍历这个坐标四周的情况,看看有多少个炸弹
    var s = getscore(pos);
    if(s!=0&&!$dom(pos).hasClass('boom')){
     $dom(pos).addClass('num'+s);
     $dom(pos).addClass('num');
    }else{
     $dom(pos).addClass('nonum');
    }
   }
  }
 }
 function getscore(p){
  var index = 0;
  var s1 = boom.find(n=>n.x==(p.x-1)&&n.y==(p.y-1))
  var s2 = boom.find(n=>n.x==(p.x)&&n.y==(p.y-1))
  var s3 = boom.find(n=>n.x==(p.x+1)&&n.y==(p.y-1))
  var s4 = boom.find(n=>n.x==(p.x-1)&&n.y==(p.y+1))
  var s5 = boom.find(n=>n.x==(p.x)&&n.y==(p.y+1))
  var s6 = boom.find(n=>n.x==(p.x+1)&&n.y==(p.y+1))
  var s7 = boom.find(n=>n.x==(p.x-1)&&n.y==(p.y))
  var s8 = boom.find(n=>n.x==(p.x+1)&&n.y==(p.y))
  if(s1){index++;}
  if(s2){index++;}
  if(s3){index++;}
  if(s4){index++;}
  if(s5){index++;}
  if(s6){index++;}
  if(s7){index++;}
  if(s8){index++;}
  return index;
 }
 function drawbooms(){
  boom.forEach(item=>{
   $dom(item).addClass('boom');
  })
 }
 function booms(){//随机产生炸弹参数
  var arr = [];
  while(arr.length<c){
   var pos = {x:Math.floor(Math.random()*x),y:Math.floor(Math.random()*y)};
   var temp = arr.find(n=>n.x==pos.x&&n.y==pos.y);
   if(!temp){
    arr.push(pos);
   }
  }
  boom = arr;
 }
 function $dom(pos){
  var dom = $("[data-x='"+pos.x+"'][data-y='"+pos.y+"']");
  if(dom.length!=0){
   return dom
  }else{
   return $("<div></div>");
  }
 }
})
思路解释
- 反正做起来没啥难度,关键还是对自己要做的东西的逻辑要有个大概的了解
- 扫雷就是一个x*y的坐标系上随机放上雷,然后遍历每一个坐标点判断它四周炸弹的总数,可以得知数字是0-8以内的可能,这样子就生成了
- 游戏性就是点击和一个额外的动作而已,就是那个假如点击到空白的地方,那么它附近的空白要自行点亮,这个效果我也做出来了,起始就是繁琐的判断而已
- 具体看js部分的代码,反正都上传了
以上就是本文的全部内容,希望对大家的学习有所帮助,也希望大家多多支持 。
很赞哦!()
大图广告(830*140)


