django中的ajax组件教程详解
Ajax(Asynchronous Javascript And XML)翻译成英文就是“异步Javascript和XML”。即用Javascript语言与服务器进行异步交互,传输的数据为XML,(现在使用更多的是json数据)。
向服务器发送请求的途径
1.浏览器地址栏 http://www.baidu.com 默认是get请求
2.form表单发送请求:
GET请求
POST请求
3.a标签 href属性 默认是get请求
4.ajax()
Ajax的特点
异步交互:客户端发送一个请求后,无需等待服务器响应结束,就可以发送第二个请求;
局部刷新:浏览器页面局部刷新
局部刷新的意思就是当咱们在博客园注册一个新的博客的时候,当咱们输入用户名后鼠标移开的时候,就发送了一个请求,去验证这个用户是否存在,如果存在,则通知用户该用户名已经被注册了。
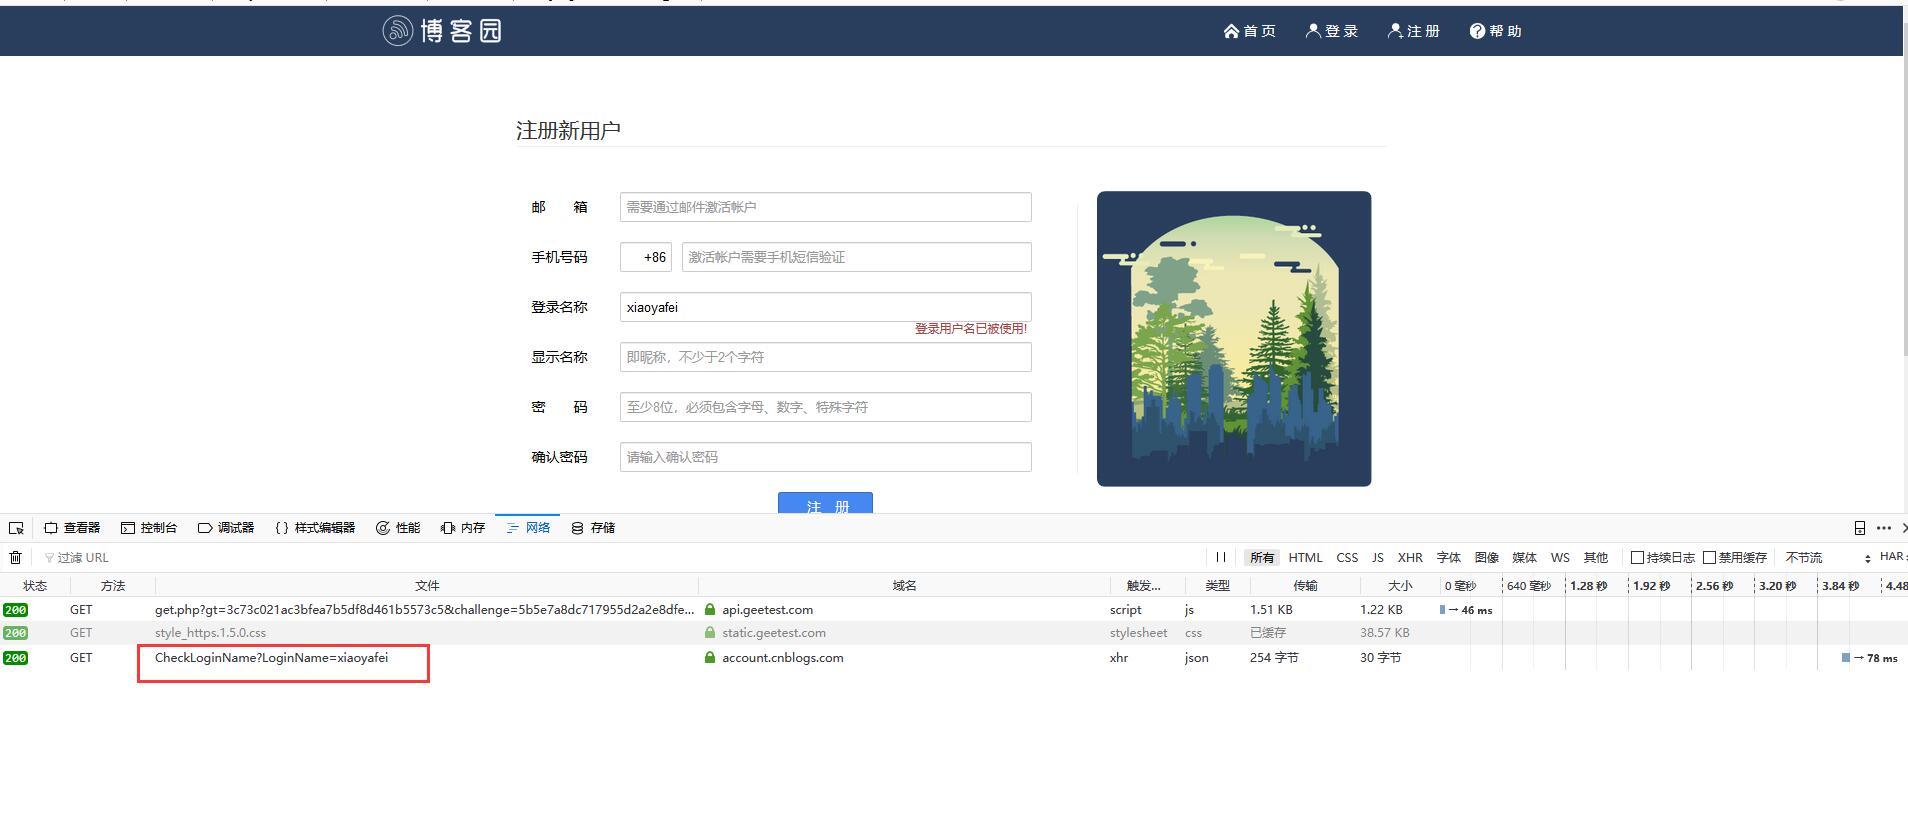
基于jquery实现的ajax请求
让我们使用pycharm重新创建一个项目,项目名为Ajax_demo,应用名为app01。
# url控制器
from django.contrib import admin
from django.urls import path
from app01 import views
urlpatterns = [
  path('admin/', admin.site.urls),
  path('index/', views.index),
  path('test_ajax/', views.test_ajax),
]
那么当我们需要有对应的视图函数 index和test_ajax:
# app01-->views.py
from django.shortcuts import render,HttpResponse
# Create your views here.
def index(request):
  return render(request, 'index.html')
def test_ajax(request):
  return HttpResponse('hello!world!')
在这里匹配了相应的视图然后返回了一个html页面:
# index.html
<!DOCTYPE html>
<html lang="en">
<head>
  <meta charset="UTF-8">
  <title>Title</title>
  <script src="http://code.jquery.com/jquery-2.1.1.min.js"></script>
</head>
<body>
  <h3>功能1:发送ajax请求</h3>
  <p class="content"></p> //这里的内容是空的
  <button class="btn">ajax</button>
  <script>
    $('.btn').click(function(){
      $.ajax({
        url:'/test_ajax/',
        type:'get',
        success:function(data){
          $('.content').html(data)
        }
      })
    })
  </script>
</body>
</html>
这句话的意思是,当咱们点击button按钮的时候,触发了点击动作,然后发送了一个ajax请求,让我们先看看此时是什么样子的:
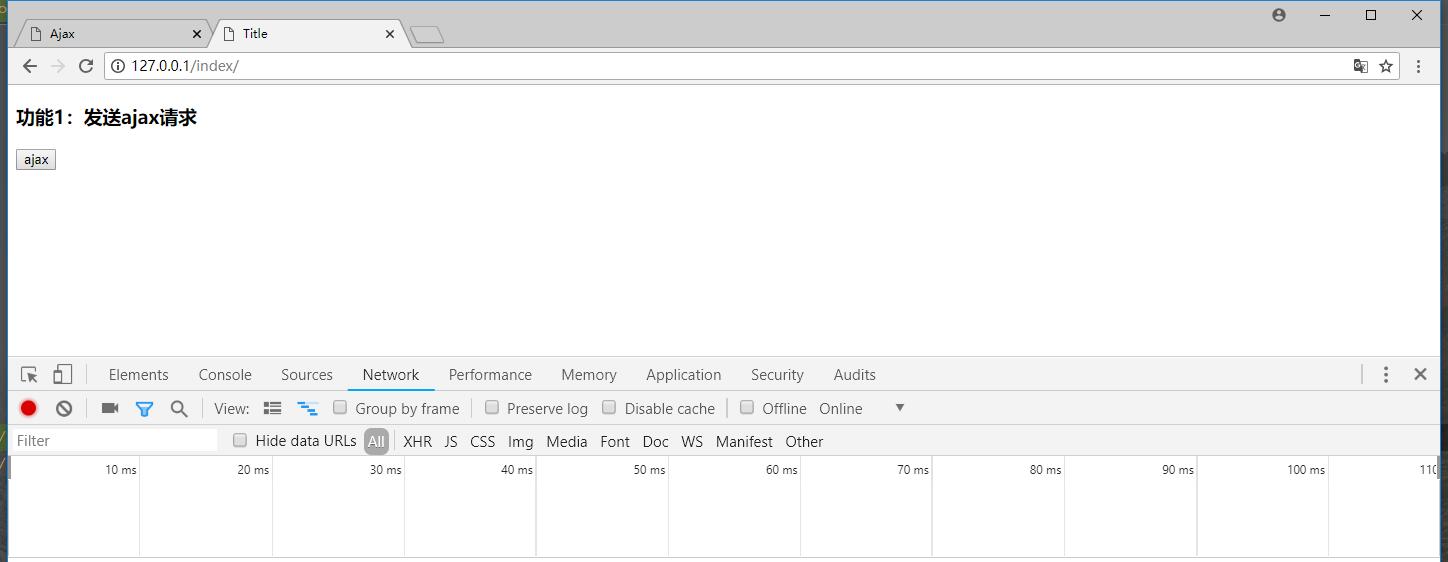
当我们点击了按钮的时候,就发送了一个ajax请求:
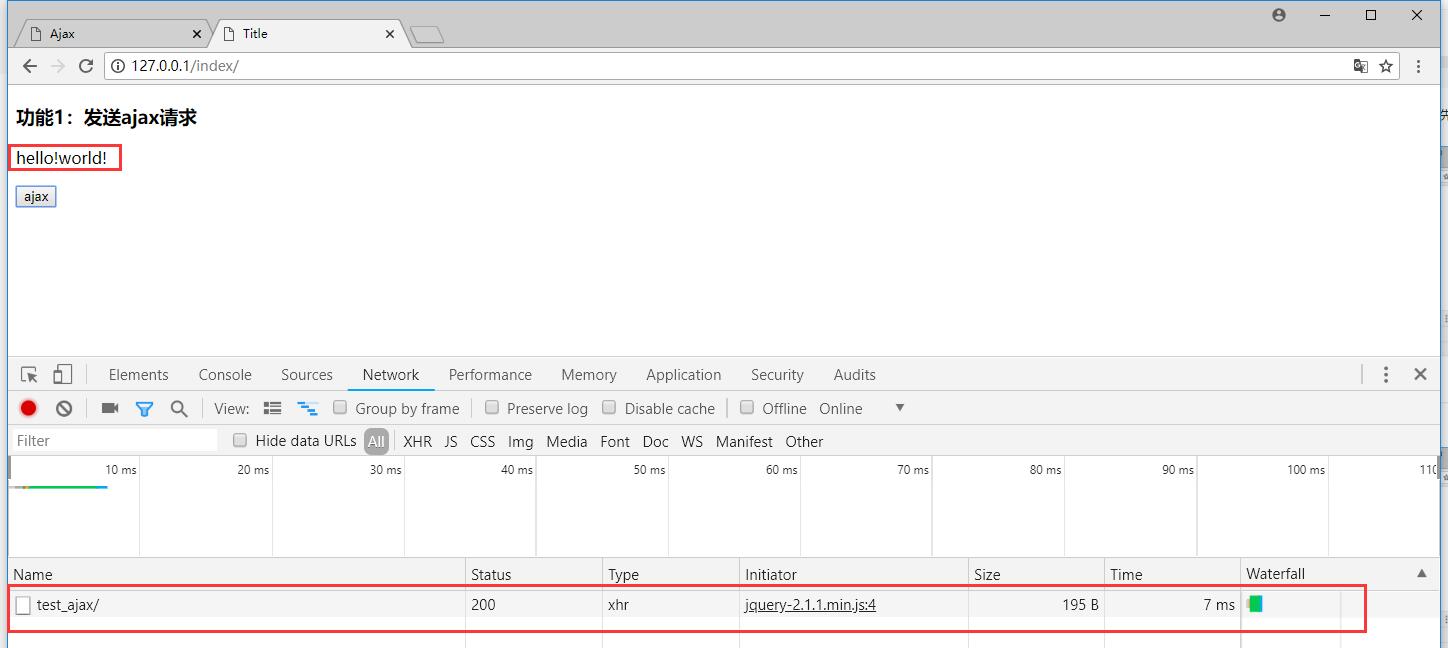
此时一个简单的ajax请求就发送完成了。
利用ajax实现计算器
首先咱们的index.html中进行布局:
# index.html
<h3>功能2:利用ajax实现的计算器</h3>
  <input type="text" class="num1">+<input type="text" class="num2">=<input type="text" id="sum"><button class="cal">计算</button>
    $('.cal').click(function(){
      $.ajax({
        url:'/cal/',
        type:'post',
        data:{
          'n1':$('.num1').val(),
          'n2':$('.num2').val(),
        },
        success:function(data){
          console.log(data);
          $('#sum').val(data);
        }
      })
    })
然后咱们拿到了n1和n2的值,通过请求url发送给相应的视图然后进行数据处理,最后拿到结果再返回给这个ajax。
# views.py

def cal(request):
  print(request.POST)
  n1 = int(request.POST.get('n1'))
  n2 = int(request.POST.get('n2'))
  sum = n1+n2
  return HttpResponse(sum)
此时的url控制器需要新添加一条:
path('cal/', views.cal),
其次是配置文件settings中的这一行需要注释掉:
# 'django.middleware.csrf.CsrfViewMiddleware',
此时再查看结果:
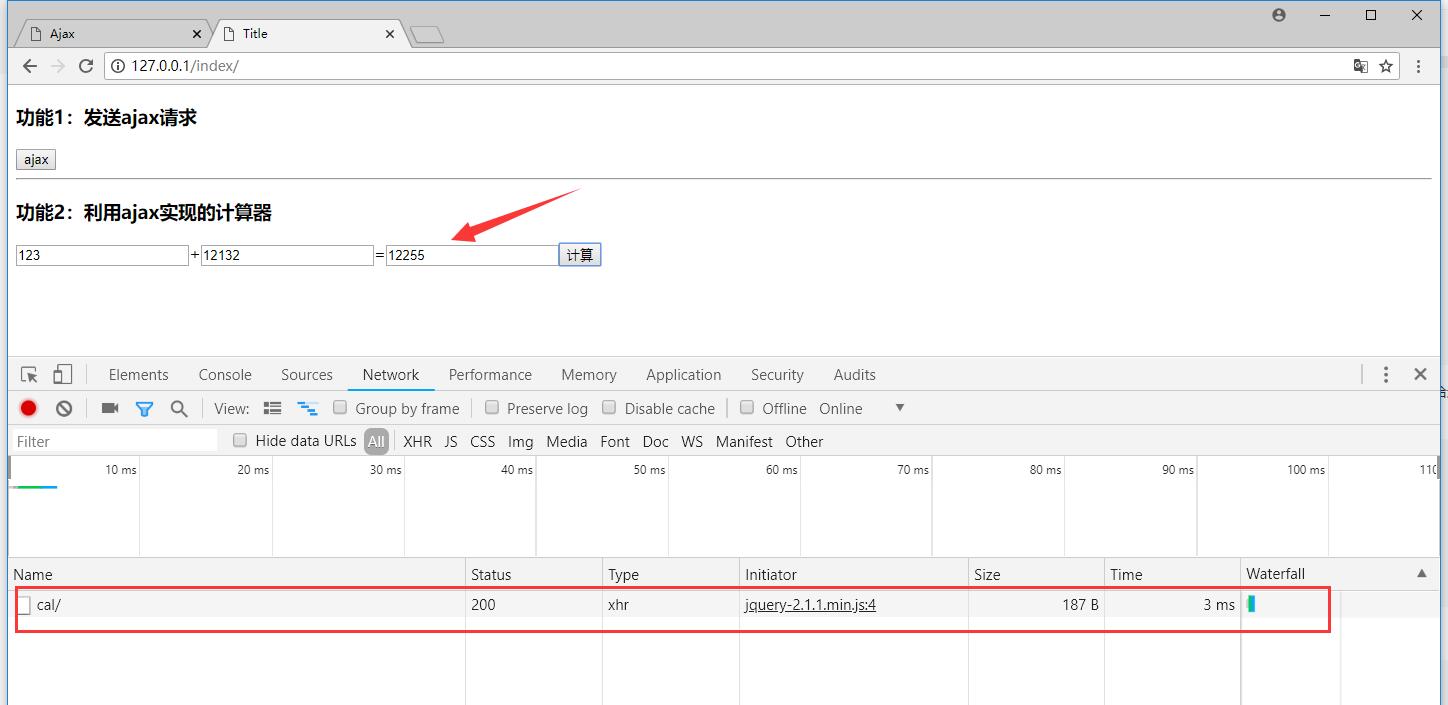
利用ajax实现登陆认证
首先咱们要开一个路由,当用户在浏览器输入http://127.0.0.1/login_btn/的时候,就匹配导对应的视图,所以:
# url控制器
from django.contrib import admin
from django.urls import path
from app01 import views
urlpatterns = [
  path('admin/', admin.site.urls),
  path('index/', views.index),
  path('test_ajax/', views.test_ajax),
  path('cal/', views.cal),
  path('login/', views.login),
  path('login_btn/', views.login_btn),
]
# login_btn函数
def login_btn(request):
  return render(request, 'login_btn.html')
然后返回了这个html页面:
<!DOCTYPE html>
<html lang="en">
<head>
  <meta charset="UTF-8">
  <title>Title</title>
  <script src="http://code.jquery.com/jquery-2.1.1.min.js"></script>
</head>
<body>
  <h3>利用ajax实现登陆认证</h3>
  <form action="">
    用户名 <input type="text" class="user">
    密码 <input type="password" class="pwd">
    <input type="button" value="submit" class="login_btn">
    <span class="error"></span>
  </form>
  <script>
    $('.login_btn').click(function(){
      $.ajax({
        url:'/login/',
        type:'post',
        data:{
          'user':$('.user').val(),
          'pwd':$('.pwd').val(),
        },
        success:function(data){
          //此时需要进行转换
          console.log(typeof(data));
          var data = JSON.parse(data)
          console.log(typeof(data));
          if (data.user){
            location.href = 'http://www.baidu.com'
          }else{
            $('.error').html(data.msg).css({'color':'red'})
          }
        }
      })
    })
  </script>
</body>
</html>
最后ajax将请求提交到了/login/中,然后进行匹配视图,然后就开始执行对应代码:
def login(request):
  # print(request.POST)
  user = request.POST.get('user')
  pwd = request.POST.get('pwd')
  from .models import User
  user = User.objects.filter(user=user, pwd=pwd).first()
  ret = {
    'user': None,
    'msg': None
  }
  if user:
    ret['user'] = user.user
  else:
    ret['msg'] = 'username or password is wrong!'
  import json
  return HttpResponse(json.dumps(ret))
首先打开浏览器,输入错误的用户名和密码:
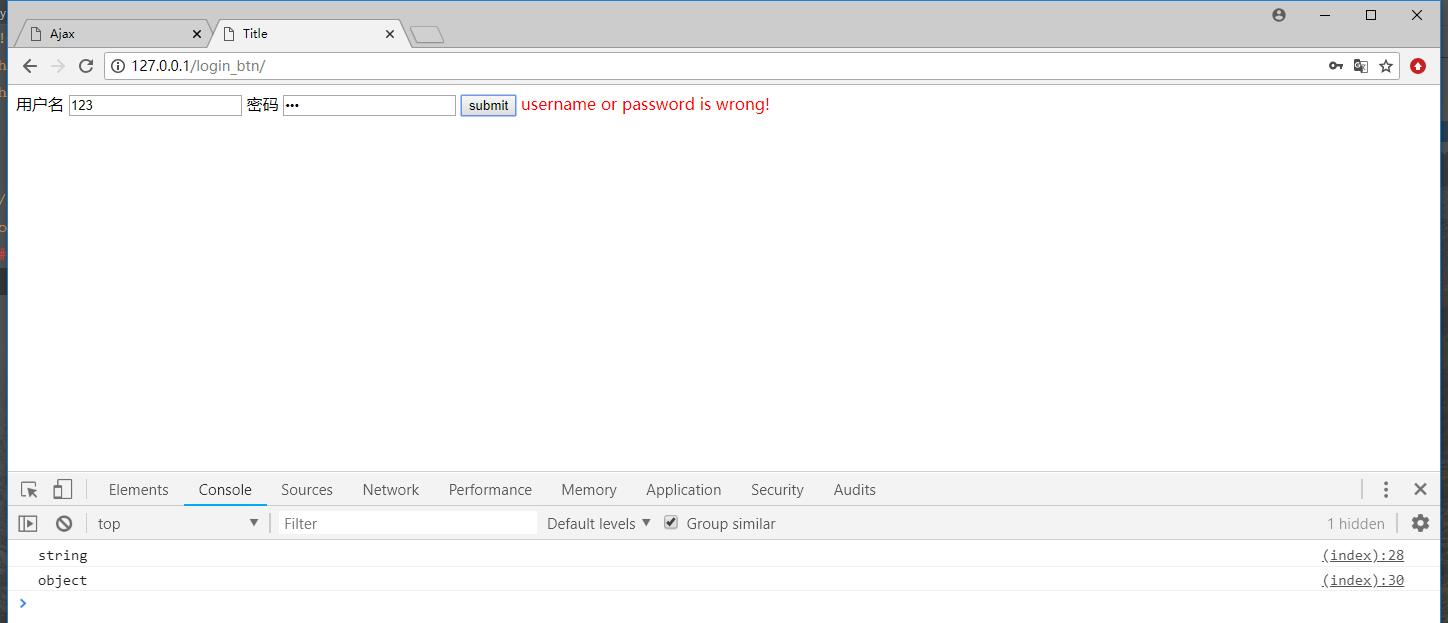
然后开始输入正确的用户名和密码,就会直接跳转到百度的首页了。
利用form表单进行文件上传
# urls.py
path('file_put/', views.file_put),
# views.py
# 文件的上传
def file_put(request):
  if request.method == 'POST':
    print(request.POST)
  return render(request, 'file_put.html')
# file_put.html
<!DOCTYPE html>
<html lang="en">
<head>
  <meta charset="UTF-8">
  <title>文件上传</title>
</head>
<body>
  <h3>基于form表单实现的文件上传</h3>
  <form action="" method="post" enctype="multipart/form-data">
    用户名 <input type="text" name="user">
    头像 <input type="file" name="avatar">
    <input type="submit">
  </form>
</body>
</html>
此时咱们输入完用户名和选中完图片后,点击提交咱们查看下打印的信息。


那么是我们的图片没有上传过来吗?当然不是的,是因为上传的图片就不在这里面。让我们在views.py中执行这个代码:
print(request.FILES)
看到的是这个样子:

那么此时我们就可以确定,这个文件是上传过来了,存放在request.FILES中,那么咱们使用request.FILES.get就可以把这个图片对象拿到了。
# views.py
 def file_put(request):
  if request.method == 'POST':
    print(request.POST) #
    # print(request.body)
    print(request.FILES) # 图片信息
    # 将文件给取出来
    img_obj = request.FILES.get('avatar')
    with open(img_obj.name, 'wb') as f:
      for line in img_obj:
        f.write(line)
    return HttpResponse('ok!')
  return render(request, 'file_put.html')
那么此时直接上传的话,那么就会在当前项目下展示这张照片。
利用ajax实现文件上传
首先我们需要新开一个url或者将之前的注释掉:
# urls.py
path('file_put/', views.file_put),
ajax提交文件的方式同样使用form表单,但是不需要给input设置name属性,只需要设置class或者id就可以了:
# file_put.html
  <form action="" method="post">
    用户名 <input type="text" id="user">
    头像 <input type="file" id="avatar" >
    <input type="button" class="btn" value="ajax">
  </form>
那么咱们需要给btn设置点击click动作:
$('.btn').click(function(){

    //涉及到文件上传 需要创建formdata对象
    var formdata = new FormData();
    formdata.append('user',$('#user').val());
    formdata.append('avatar',$('#avatar')[0].files[0]);

    $.ajax({
      url:'',
      type:'post',
      contentType:false, // 交给FormData处理编码
      processData:false, //对数据是否进行预处理 如果不做预处理的话 就不做任何编码了
      data:formdata,
      success:function(data){
        console.log(data)
      }
    })
  })
最后在试图函数中进行文件保存操作:
def file_put(request):
  if request.method == "POST":
    print("body", request.body) # 请求报文中的请求体 json
    print("POST", request.POST) # if contentType==urlencoded ,request.POST才有数据
    print('FILES', request.FILES)
    file_obj=request.FILES.get("avatar")
    with open(file_obj.name,"wb") as f:
      for line in file_obj:
        f.write(line)
    return HttpResponse("OK")
  return render(request, "file_put.html")
Content-Type
在咱们刚刚的form表单的文件上传和ajax文件上传的时候,都涉及到一个请求头的东西,这个东西是什么呢?这个东西决定着服务器会按照哪种编码格式给你解码,当你默认不写的时候,此时的请求头是:application/x-www-form-urlencoded,当你想发送文件类的东西,此时的请求头应该是:form-data......
当服务器收到客户端发送过来的请求时,首先就会去查看请求头,判断你的请求头是什么,然后进行解码。
让我们分别看下这几个请求头:
x-www-form-urlencoded
application/x-www-form-urlencoded:表单数据编码为键值对,&分隔,可以当成咱们的GET请求中?后面的数据,让我们发送一个庶几乎看看:
<form action="" method="post"> 用户名 <input type="text" name="user"> 密码 <input type="password" name="pwd"> <input type="submit" value="submit"> </form>
那么我们需要一个视图函数还进行处理:
def file_put(request):
  if request.method == "POST":
    print("body", request.body) # 请求报文中的请求体 json
    print("POST", request.POST) # if contentType==urlencoded ,request.POST才有数据
    return HttpResponse("OK")
  return render(request, "file_put.html")
当我们在浏览器输入admin和123的时候,让我们来看下打印的结果是什么:
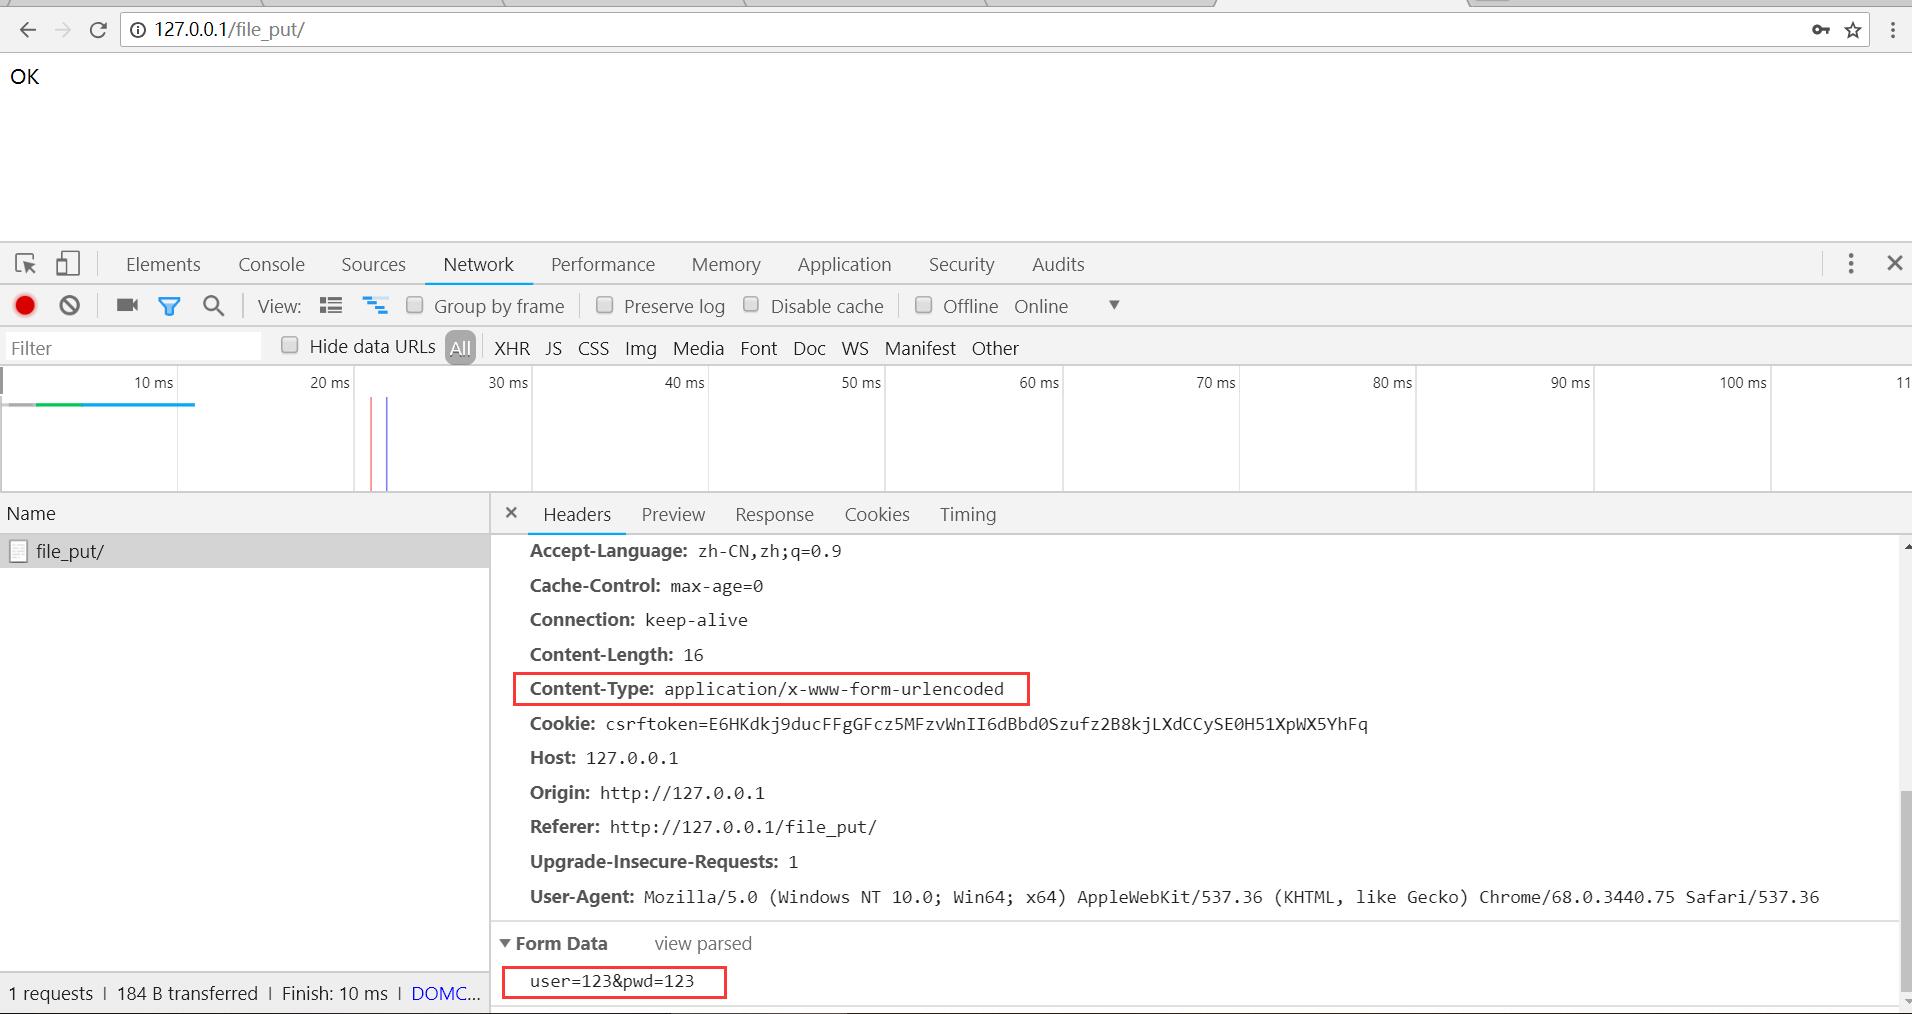
我们刚刚说过,当我们请求头什么都不写的话,那么就是默认的x-www-form-urlencoded,当请求头是这种的话,此时我们打印request.POST是有值的,也就这一种请求方式request.POST才有值。

让我们现在发送一个json的数据
<!DOCTYPE html>
<html lang="en">
<head>
  <meta charset="UTF-8">
  <title>Title</title>
  <script src="http://code.jquery.com/jquery-2.1.1.min.js"></script>
</head>
<body>
<form action="" method="post">
  用户名 <input type="text" class="user">
  密码 <input type="password" class="pwd">
  <input type="button" value="submit" class="btn">
</form>
<script>
  $('.btn').click(function(){
    $.ajax({
      url:'',
      type:'post',
      data:JSON.stringify({
        a:1,
        b:2
      }),
      success:function(data){
        console.log(data)
      }
    })
  })
</script>
</body>
</html>
视图函数中是这样的:
def send_json(request):
  if request.method == 'POST':
    print('body', request.body)
    print('post', request.POST)
    print('files', request.FILES)
    return HttpResponse('ok!')
  return render(request, 'send_json.html')
当我们发送数据的时候,通过解码收到的就是这样的数据:

就和我们刚刚说的一样,当请求头是x-www-form-urlencoded的时候,request.POST才会有数据,其他的就没有。
总结
以上所述是小编给大家介绍的django中的ajax组件教程详解,希望对大家有所帮助,如果大家有任何疑问请给我留言,小编会及时回复大家的。在此也非常感谢大家对 网站的支持!


