linux shell
一文掌握Linux命令lsscsi
想要弄明白lsscsi命令,首先我们必须搞清楚什么是SCSI,以及常见的硬盘接口,常用的硬盘参数。
一、什么是scsi
SCSI(Small Computer System Interface)是一套完整的数据传输协议,其主要功能是在主机和存储设备之间传送命令、状态和块数据。在各类存储技术中,SCSI技术可谓是最重要的脊梁。
SCSI协议位于操作系统和外部资源之间,它具有一系列的功能组件,操作系统对外部设备(如磁盘、磁带、光盘、打印机等)的I/O操作均可以通过SCSI协议来实现,一般情况下,SCSI协议都嵌入到设备驱动器或者主机适配器的板载逻辑中。
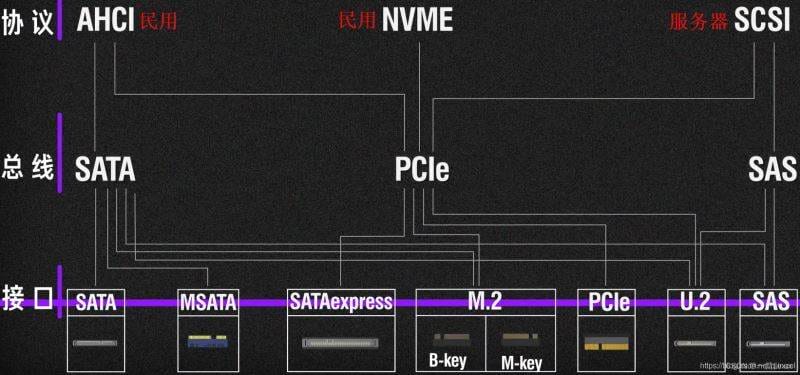
二、常见硬盘接口
1. IDE接口的硬盘
其英文名称:Integrated Drive Electronics,常见的2.5英寸IDE硬盘接口它的本意是指把“硬盘控制器”与“盘体”集成在一起的硬盘驱动器。
IDE代表着硬盘的一种类型,但在实际的应用中,人们也习惯用IDE来称呼最早出现IDE类型硬盘ATA-1,这种类型的接口随着接口技术的发展已经被淘汰了,而其后发展分支出更多类型的硬盘接口,比如ATA、Ultra ATA、DMA、Ultra DMA等接口都属于IDE硬盘。
其特点为:价格低廉,兼容性强,性价比高,数据传输慢,不支持热插拔等等。

2. SCSI接口硬盘
SCSI并不是专门为硬盘设计的接口,是一种广泛应用于小型机上的高速数据传输技术。
SCSI接口具有应用范围广、多任务、带宽大、CPU占用率低,以及热插拔等优点,但较高的价格使得它很难如IDE硬盘般普及,因此SCSI硬盘主要应用于中、高端服务器和高档工作站中。
其特点为:传输速率高、读写性能好、可连接多个设备、可支持热插拔,但是价格相对来说比较贵。
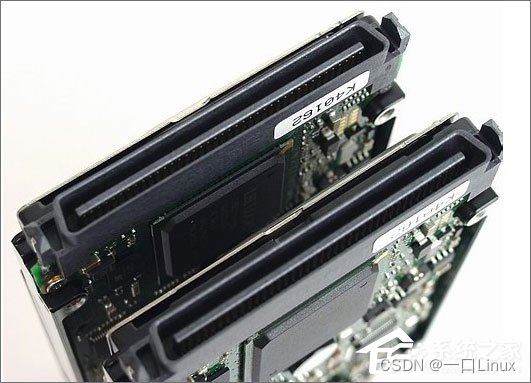
3. SATA接口类型
其英文名称为:Serial Advanced Technology Attachment。使用SATA(Serial ATA)口的硬盘又叫串口硬盘,是未来PC机硬盘的趋势。
Serial ATA采用串行连接方式,串行ATA总线使用嵌入式时钟信号,具备了更强的纠错能力,与以往相比其最大的区别在于能对传输指令(不仅仅是数据)进行检查,如果发现错误会自动矫正,这在很大程度上提高了数据传输的可靠性。
串行接口还具有结构简单、支持热插拔的优点。
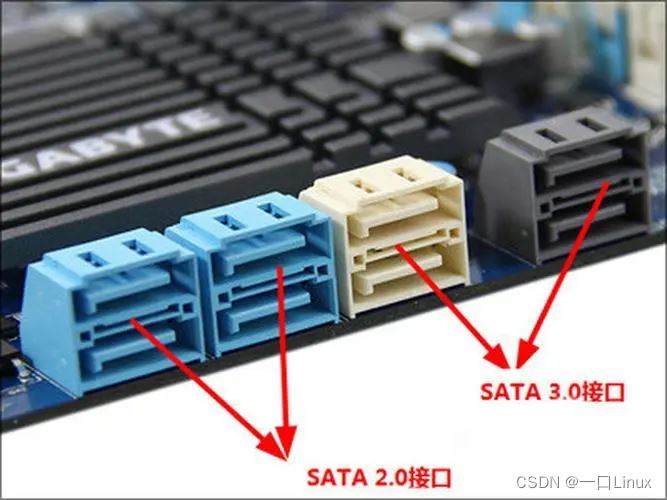
三、 lsscsi命令
lsscsi列出scsi/sata设备信息,比如硬盘驱动器,光盘驱动器。
1. lsscsi 命令安装
-bash: lsscsi command not found

#Debian
apt-get install lsscsi

#Ubuntu
apt-get install lsscsi

#Alpine
apk add lsscsi

#Arch Linux
pacman -S lsscsi

#Kali Linux
apt-get install lsscsi

#CentOS
yum install lsscsi

#Fedora
dnf install lsscsi

#Raspbian
apt-get install lsscsi

#Docker
docker run cmd.cat/lsscsi lsscsi
2. lsscsi命令英文手册
详细命令说明地址
https://sg.danny.cz/scsi/lsscsi.html
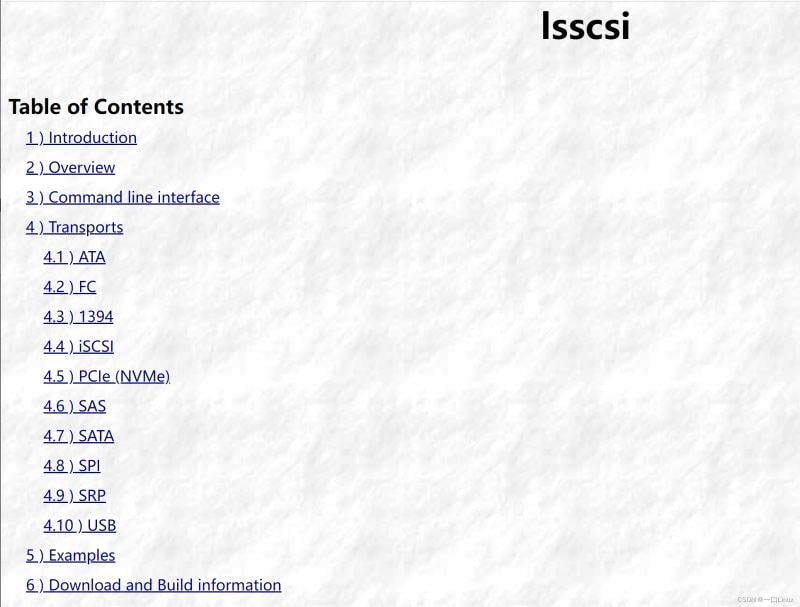
3. 命令格式
lsscsi 命令语法:
lsscsi [选项] [H:C:T:L]
lsscsi 命令选项:
| 选项 | 含义 |
|---|---|
| -g | 显示SCSI通用设备文件名称 |
| -k | 显示内核名称而不是设备节点名 |
| -d | 显示设备节点的主要号码和次要号码 |
| -H | 列出当前连接到系统的SCSI主机而不是SCSI设备 |
| -l | 显示每一个SCSI设备(主机)的附加信息 |
| -c | 相对于执行 cat /proc/scsi/scsi 命令的输出 |
| -p | 显示额外的数据完整性(保护)的信息 |
| -t | 显示传输信息 |
| -L | 以“属性名=值”的方式显示附加信息 |
| -v | 当信息找到时输出目录名 |
| -y<路径> | 假设sysfs挂载在指定路径而不是默认的 “/sys” |
| -s | 显示容量大小。 |
| -c | 用全称显示默认的信息。 |
| -d | 显示设备主,次设备号。 |
| -g | 显示对应的sg设备名。 |
| -H | 显示主机控制器列表,-Hl,-Hlv。 |
| -l | 显示相关属性,-ll,-lll=-L。 |
| -v | 显示设备属性所在目录。 |
| -x | 以16进制显示lun号。 |
| -p | 输出DIF,DIX 保护类型。 |
| -P | 输出有效的保护模式信息。 |
| -i | 显示udev相关的属性 |
| -w | 显示WWN |
| -t | 显示相应传输信息(ATA,FC,SBP,ISCSI,SPI,SAS,SATA,USB),-Ht,-tl.(包括sas地址) |
4. 结果含义

四、命令举例
lsscsi 列出所有 SCSI 设备:
peng@ubuntu:~$ lsscsi
[3:0:0:0]    cd/dvd  NECVMWar VMware SATA CD01 1.00  /dev/sr0
[32:0:0:0]   disk    VMware,  VMware Virtual S 1.0   /dev/sda
lsscsi -L列出所有具有详细属性的 SCSI 设备:
peng@ubuntu:~$ lsscsi -L
[3:0:0:0]    cd/dvd  NECVMWar VMware SATA CD01 1.00  /dev/sr0
  device_blocked=0
  iocounterbits=32
  iodone_cnt=0x229
  ioerr_cnt=0x4
  iorequest_cnt=0x23a
  queue_depth=1
  queue_type=none
  scsi_level=6
  state=running
  timeout=30
  type=5
[32:0:0:0]   disk    VMware,  VMware Virtual S 1.0   /dev/sda
  device_blocked=0
  iocounterbits=32
  iodone_cnt=0x37370
  ioerr_cnt=0x3
  iorequest_cnt=0x37370
  queue_depth=32
  queue_type=simple
  scsi_level=3
  state=running
  timeout=180
  type=0
lsscsi -s列出所有具有人类可读磁盘容量的 SCSI 设备:
peng@ubuntu:~$ lsscsi -s
[3:0:0:0]    cd/dvd  NECVMWar VMware SATA CD01 1.00  /dev/sr0        -
[32:0:0:0]   disk    VMware,  VMware Virtual S 1.0   /dev/sda    536GB
五、其他
1. Linux下scsi相关文件节点
/proc/scsi/
peng@ubuntu:~$ cd /proc/scsi/
peng@ubuntu:/proc/scsi$ ls
device_info  mptspi  scsi  sg

peng@ubuntu:/proc/scsi$ cat scsi
Attached devices:
Host: scsi32 Channel: 00 Id: 00 Lun: 00
  Vendor: VMware,  Model: VMware Virtual S Rev: 1.0
  Type:   Direct-Access                    ANSI  SCSI revision: 02
Host: scsi3 Channel: 00 Id: 00 Lun: 00
  Vendor: NECVMWar Model: VMware SATA CD01 Rev: 1.00
  Type:   CD-ROM                           ANSI  SCSI revision: 05
/sys/class/scsi_host
peng@ubuntu:/sys/class/scsi_host$ ls
host0   host12  host16  host2   host23  host27  host30  host5  host9
host1   host13  host17  host20  host24  host28  host31  host6
host10  host14  host18  host21  host25  host29  host32  host7
host11  host15  host19  host22  host26  host3   host4   host8
/sys/class/scsi_device
peng@ubuntu:/sys/class/scsi_device$ ls
3:0:0:0  32:0:0:0
/sys/class/scsi_disk
peng@ubuntu:/sys/class/scsi_disk$ ls
32:0:0:0
/sys/class/scsi_generic
peng@ubuntu:/sys/class/scsi_generic$ ls
sg0  sg1
/sys/bus/scsi
peng@ubuntu:/sys/bus/scsi$ ls
devices  drivers  drivers_autoprobe  drivers_probe  uevent
peng@ubuntu:/sys/bus/scsi/devices$ ls
3:0:0:0   host11  host16  host20  host25  host3   host5  target3:0:0
32:0:0:0  host12  host17  host21  host26  host30  host6  target32:0:0
host0     host13  host18  host22  host27  host31  host7
host1     host14  host19  host23  host28  host32  host8
host10    host15  host2   host24  host29  host4   host9
其中target3:0:0
对应
host:bus:id:lun
2. Linux 开启 SCSI 日志调试功能
1.编译选项中需开启 CONFIG_SCSI_LOGGING
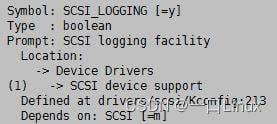
2.该编译选项说明
drivers/scsi/Kconfig:213
config SCSI_LOGGING
    bool "SCSI logging facility"
    depends on SCSI
    ---help---
      This turns on a logging facility that can be used to debug a number
      of SCSI related problems.

      If you say Y here, no logging output will appear by default, but you
      can enable logging by saying Y to "/proc file system support" and
      "Sysctl support" below and executing the command

      echo <bitmask> > /proc/sys/dev/scsi/logging_level

      where <bitmask> is a four byte value representing the logging type
      and logging level for each type of logging selected.

      There are a number of logging types and you can find them in the
      source at <file:drivers/scsi/scsi_logging.h>. The logging levels
      are also described in that file and they determine the verbosity of
      the logging for each logging type.

      If you say N here, it may be harder to track down some types of SCSI
      problems. If you say Y here your kernel will be somewhat larger, but
      there should be no noticeable performance impact as long as you have
      logging turned off.
3.logging 类型源码文件位置(有说明)
-> drivers\scsi\scsi_logging.h
4.使用说明
/*
 * Note - the initial logging level can be set here to log events at boot time.
 * After the system is up, you may enable logging via the /proc interface.
 */
unsigned int scsi_logging_level;
#if defined(CONFIG_SCSI_LOGGING)
EXPORT_SYMBOL(scsi_logging_level);
#endif
scsi_logging_level 被定义成int类型(32bit),该机制使用了30个bit,从低位到高位每3bit为一个logging level从SCSI_LOG_ERROR_SHIFT到SCSI_LOG_IOCTL_SHIFT(SCSI_LOG_XXX_SHIFT为不同level的移位数),每个level使用的bit数都是3,所以 SCSI_LOG_XXX_BITS 均为3
5.scsi_logging_level 值可以在 boot 命令行设置也可以开启设备后在 /proc 文件系统中设置:
-1   - Enable scsi events to syslog.         // 开启所有scsi log
0    - Disable scsi events to syslog.        // 关闭所有scsi log
命令:
echo 0/-1 > /proc/sys/dev/scsi/logging_level
到此这篇关于Linux命令lsscsi详解的文章就介绍到这了,更多相关Linux命令lsscsi内容请搜索以前的文章或继续浏览下面的相关文章希望大家以后多多支持!


